1
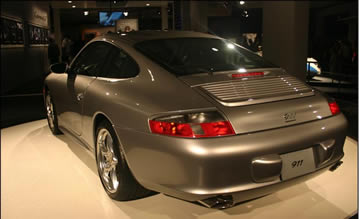
Take this picture of a Porsche as an example, it is a little bit underexposed and could be touched up with just a little bit of levels or curves. Instead of just brightening the image which would be our natural instant, let’s create a bit more interest and instead create a spotlight effect.
2
Begin by creating a selection with the elliptical marquee tool. 3
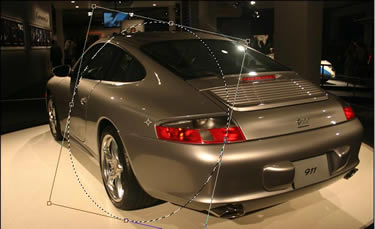
Choose Select>Transform Selection
A bounding box will appear
You can now rotate, scale and resize the selection
Rotate the selection so that the oval falls on the car at an angle as shown
4
Press enter/return to apply the transformation to the selection
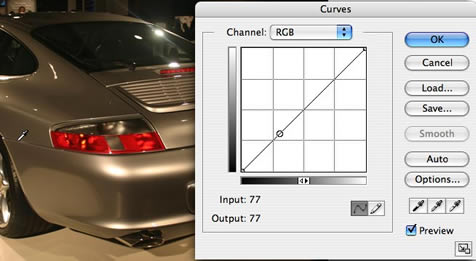
We are now going to create a curves adjustment layer.
Choose a new adjustment layer from the bottom of the layers palette and select curves
You should now see the curves dialog box
Move the mouse outside the box and into the image, you will notice that it is now an eyedropper tool
Click and drag and you will see a little circle appear on the diagonal line of the curve. This is the tonal range of the area that you are moving the mouse over. Take a note of where the range is on the curve.
5
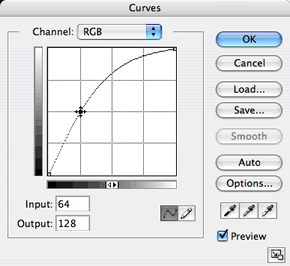
Click and drag on the curve. Move the point up and notice that the image will be lightened.
6

If you look at the layers palette, you will see the adjustment layer with a layer mask applied. Notice that the area of the mask where the selection was present is now white.
Click on the mask to make it active (It should already be active by default)
7
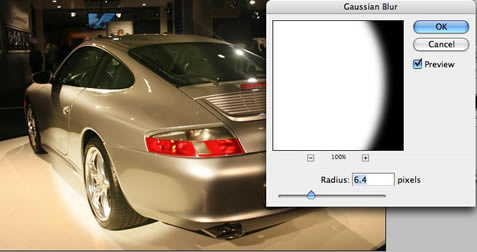 We will now soften the lights edge
Choose Filter>blur>Gaussian blur
8
The spotlight effect should be looking pretty good by now.
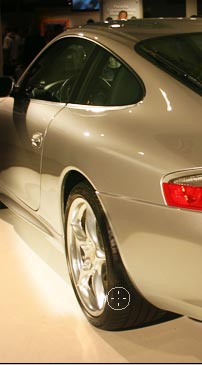
The final thing is to remove the effect from the areas that would be in shadow and not illuminated in real life. (such as the air)
Choose black for the foreground color and select the brush tool
Click and drag the paintbrush and you will paint away the adjustment from the regions you desire because you are painting on a mask
9
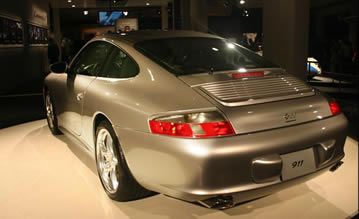
And finally we have our result, a soft spotlight on our car. Compare this to the starting image to see the difference.
You can lower the opacity of the adjustment layer if you desire to tone down the effect a little. You can use this technique on all kinds of photos including people. This is a great way to draw attention to certain areas of images and put things under the err… spotlight.